
Chile De Arbol Salsa
This fast red salsa uses dry-toasted de arbol pods, tomato, garlic, and lime for a sharp taco sauce that stays bright instead of bitter.
This salsa should taste sharp, toasted, and fast. We use dry pods for a narrow red heat that snaps across tacos, eggs, beans, and grilled meat without turning the bowl into a tomato salsa.
The NMSU Chile Pepper Institute places chile de arbol in a hot range near 15,000 to 30,000 SHU, so the recipe needs control from the first skillet move. Tomato steadies the burn, but the pod still leads the sauce.
Pick pods that still have red life
The buying check is more important than the blender speed. Good dried pods bend a little before they crack, smell like clean dried fruit, and keep a deep red color.
Dusty brown pods make a dull sauce. Pods with a papery, hollow smell usually need more tomato and lime to wake them up, and that pushes the salsa toward tomato dip instead of chile sauce.
- Best bag: whole pods, few broken stems, red skins, no stale powder at the bottom.
- Use soon: dry chiles lose aroma faster after the bag is opened, so seal them away from light and heat.
- Skip: pods with mold, wet spots, or a sour smell.
We remove stems and shake out loose seeds before toasting. That lowers grit and gives the blender a cleaner start, but it does not turn a hot chile mild.
Toast the chile for seconds, not color
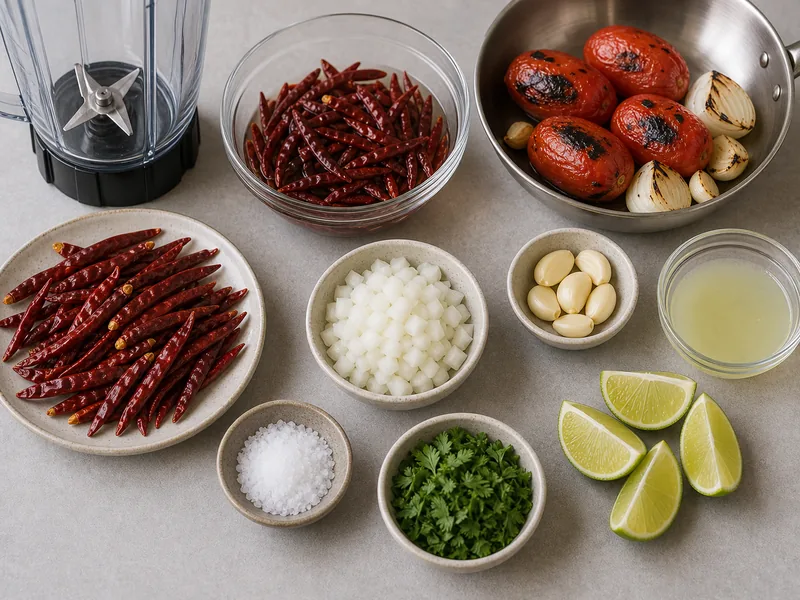
Toast depth controls the whole bowl. A good toast smells bright and nutty after 15 to 25 seconds per side.
Dark spots are fine. Black patches are not, because the skin bitterness moves into the blender and stays there after acid and salt are added.
- Right smell: warm dried chile, a little nutty, still red.
- Too far: smoke, harshness, or pods that crumble black at the edge.
- Best pan: dry skillet over medium heat, shaken often so the pods do not sit still.
We toast the garlic in its skin and brown the onion in the same pan. That gives the salsa a cooked base without making garlic the lead flavor.
Soak until the pods bend cleanly
A thin chile de arbol salsa depends on a full soak. Pods that still feel leathery make a gritty sauce and force the blender to work too hard.
Fifteen minutes in hot water is usually enough for dried pods from a fresh bag. Older pods may need 5 more minutes, and that is better than adding too much soaking water later.
Use the soaking water carefully. It carries color and heat, but it can also carry bitterness if the toast went too dark.
- Clean batch: use 1/4 cup soaking water in the blender.
- Harsh batch: use hot fresh water instead.
- Very hot batch: blend in more roasted tomato before adding more liquid.
Choose the liquid by the taco, not by habit
Soaking water carries chile flavor, but it can also carry bitterness from old skins. We taste it before it goes into the blender.
If the soaking water tastes clean and lightly red, use a few spoonfuls to sharpen the chile note. If it tastes harsh, use fresh hot water and let tomato, lime, and salt build the finish.
For carne asada, a thinner salsa with more soak liquid spreads better across the meat. For eggs, beans, or quesadillas, a thicker spoonable salsa keeps the heat in small streaks instead of flooding the plate.
Let tomato brake the burn
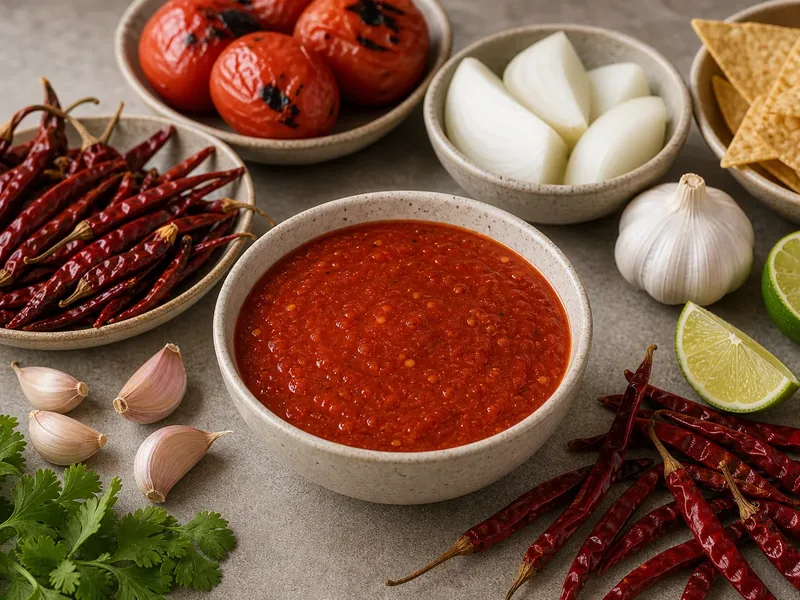
Tomato is a brake here, not the main body. Two Roma tomatoes give enough pulp to catch the chile oil and enough sweetness to round the dry heat.
This is why the page stays separate from fresh tomato salsa. That salsa should taste juicy and tomato-led; this one should taste like toasted chile first.
If the salsa tastes flat, add salt before adding lime. Salt makes the dried pod taste clearer, while too much acid can make the bitterness louder.
Blend for a taco spoon
This salsa should pour from a spoon in a thin ribbon. It should not sit like dip, and it should not run like chile water.
Blend until the skins disappear, then stop for 30 seconds and check the texture. Dried chile skins hydrate after blending, so a sauce that looks perfect in the jar may thicken after it rests.
- For tacos: keep it loose enough to streak across meat.
- For chips: leave it slightly thicker so it clings.
- For eggs: strain only if the blender left flakes that feel tough.
A high-speed blender makes the smoothest version. A standard blender works if the pods are fully soaked and the batch is not overloaded.
Keep this apart from other dried-chile salsas
Chile de arbol is the sharp one in the dried-salsa group. Guajillo salsa should taste broader and fruitier, while cascabel chile salsa should lean nutty and round.
This salsa is useful when a dish already has fat, beans, egg yolk, cheese, or grilled meat to absorb the burn. It is less useful as a mild table dip for long snacking.
For a deeper dark salsa, use pasilla or chipotle instead of forcing chile de arbol to act smoky. The pod is better when it stays quick and clean.
Strain only when the serving job needs it
A coarse blend is better for tacos because the chile skin and tomato pulp grip the tortilla. A strained version is better for squeeze bottles, breakfast plates, or a thin drizzle over soup.
Do not strain by default. Straining removes some bitterness, but it also removes body, roasted garlic, and the tiny chile bits that make the salsa taste alive.
If you strain, press gently and stop before the mesh holds only dry paste. That dry paste tastes bitter because the good liquid has already passed through.
- Leave coarse: tacos, beans, eggs, grilled meat, quesadillas.
- Strain lightly: squeeze bottle, soup garnish, thin breakfast salsa.
- Do not rescue by water: roasted tomato fixes texture better than dilution.
Use it in small, direct hits
A teaspoon can change a taco. That is the right serving scale for this salsa because the heat arrives quickly and keeps climbing for a few seconds.
We like it on carnitas, scrambled eggs, black beans, roasted potatoes, grilled shrimp, and quesadillas. It also works as a finishing streak in soups where a thicker salsa would muddy the broth.
USDA FoodData Central treats peppers as low-calorie ingredients, but this recipe is about heat behavior more than nutrition. The capsaicin sits mostly in the chile membranes, so removing seeds alone does not make the salsa mild.
Balance lime and salt after the salsa rests
The first spoonful can mislead you because hot chile feels louder before the tomato and salt settle. Give the blended salsa 10 minutes, then taste again.
If it tastes flat, salt is usually missing before lime is missing. If it tastes hot but hollow, lime helps the finish. If it tastes sharp and thin, another spoonful of roasted tomato gives the heat something to hold onto.
- Too hot: blend in more roasted tomato, not water.
- Too smoky: add lime in small amounts and stop before it tastes sour.
- Too thick: loosen with clean soak liquid only if that liquid tastes good.
For a sharper table salsa, chill it uncovered for 10 minutes before lidding so steam does not condense back into the bowl. Extra water softens the toasted edge and makes the salsa taste flatter the next day.
Store cold because this is not a canning formula
Cool the salsa, move it to a clean jar, and refrigerate it. Use it within about 4 days for the best aroma.
NCHFP guidance is clear that salsa canning depends on tested acid ratios, not guesswork. This recipe uses lime or vinegar for flavor balance, not shelf-stable preservation.
If you need a longer storage plan, freeze small portions in an ice cube tray. The texture loosens after thawing, but the chile flavor stays useful for beans and braises.
Use seeds as a texture choice, not a macho test
Seeds do not hold most of the capsaicin, but they carry loose pith, grit, and bitter fragments from the dried pod. Leaving every seed in makes the salsa look rougher and taste sharper.
For a smoother table salsa, shake out loose seeds before toasting and keep the intact pods. For a hotter, rustic bowl, leave some seeds and blend longer so they do not sit like sand at the bottom.
If the finished salsa feels gritty, rest it five minutes and check the bottom of the bowl. A quick stir may be enough; if not, pass only part of the batch through a mesh strainer and stir it back.
Fix the salsa by reading the first flaw
A bitter salsa needs more roasted tomato and a little salt. A thin salsa needs rest first, then a spoonful of tomato pulp if it still runs.
A salsa that feels hot but dull usually needs acid. Add lime in 1 teaspoon increments, then wait before adding more.
- Too smoky: the pods toasted too far, so dilute with tomato.
- Too grassy: the chiles were under-toasted or fresh pods were used.
- Too salty: blend in another roasted tomato, not water.
- Too sharp: rest 20 minutes before changing the batch.
The best next-batch fix is usually toast control. Once the pods are bitter, the blender cannot fully undo it.
Ingredients
-
1 oz dried chile de arbolstems removed
-
2 Roma tomatoeshalved
-
1/4 white onionthick sliced
-
1 garlic cloveunpeeled for roasting
-
1 tablespoon lime juice or cider vinegar
-
3/4 teaspoon kosher saltplus more to taste
-
1/4 cup hot soaking waterplus more as needed
-
2 tablespoons chopped cilantrooptional
Full Recipe Instructions
Toast the chile…
Toast the chile de arbol in a dry skillet for 15 to 25 seconds per side, just until fragrant.
Cover the toasted…
Cover the toasted chiles with hot water and soak 15 minutes until pliable.
Roast the tomatoes,…
Roast the tomatoes, onion, and garlic in the same skillet until the cut sides brown and the garlic softens.
Blend drained chiles,…
Blend drained chiles, roasted vegetables, lime juice or vinegar, salt, and 1/4 cup soaking water until pourable.
Rest 10 minutes,…
Rest 10 minutes, taste for salt and acid, then pulse in cilantro if using.